DIY Mechanical Keyboard

Electromechanical Fabrication

Project Overview

While transitioning into a more software-oriented career, I started to develop chronic tension in my wrist from increased time spent typing on a traditional keyboard and poor ergonomic setup. The solution: build my own. Using open-source CAD (1, 2) and the Quantum Mechanical Keyboard (QMK) Firmware and open source community, I was able to build a fully functional ortholinear, split mechanical keyboard from the ground up.

My Contributions

This keyboard is a continuing labor of love. I 3D printed and post-processed the keyboard case; sourced materials; completed and tested the system circuitry; setup the QMK build environment; modified, deployed, and iterated upon the keymapping; fully finished and assembled the product; and actively quality test it by using it daily for intensive gaming. I also completed a set of 3D printed keycaps, however was not satisfied with the tactile feel and appearance and am currently using 3D printing, silicone mold making, and resin casting to produce bespoke keycaps. I am also currently drafting a next keyboard design for my particular wrist-hand geometry and function requirements.
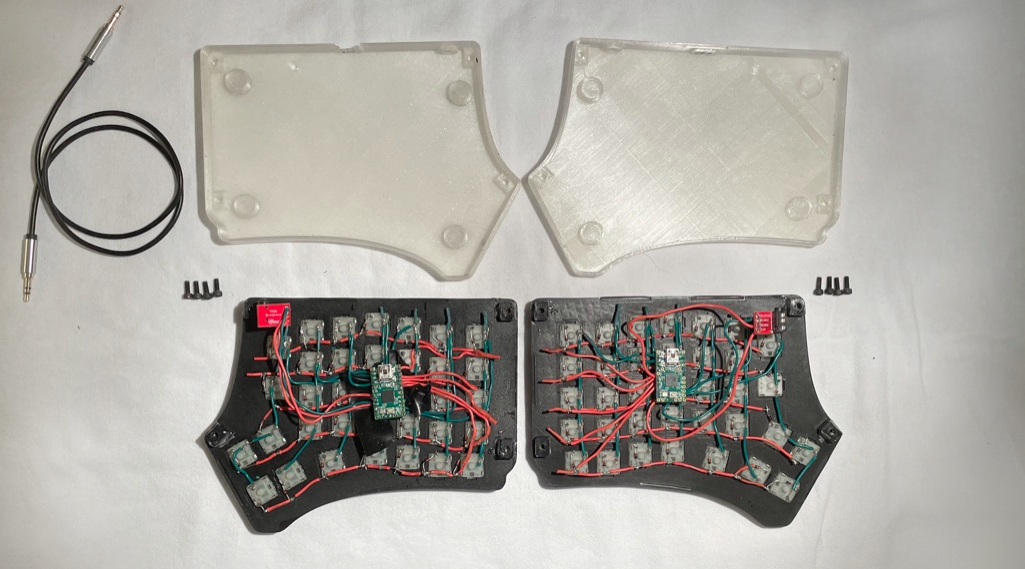
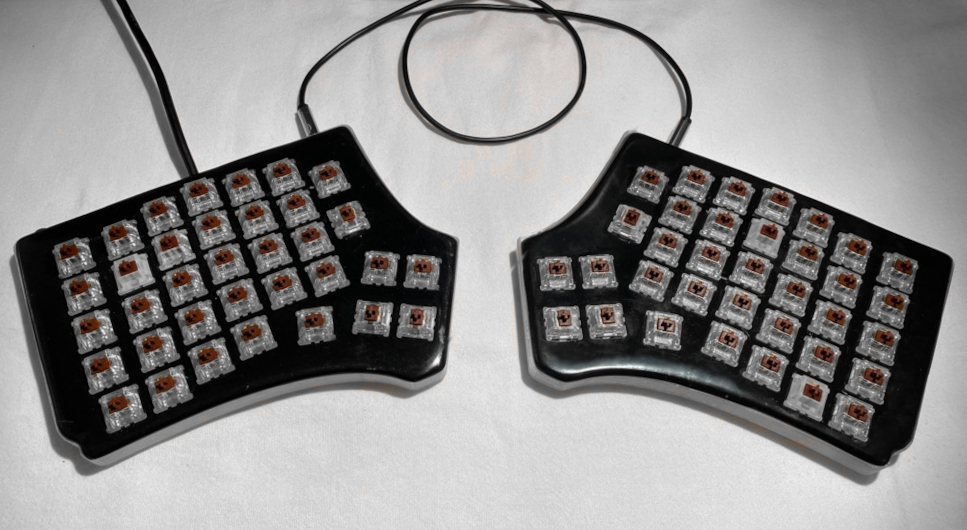
Through this project I have gained practical knowledge of small scale production, rapid prototyping, electronics and programming, and new fabrication processes, as well as experience with Fusion 360, OpenSCAD, Teensy 2.0 documentation and limitations, soldering, and 3D printer parameter tuning for product and material requirements.
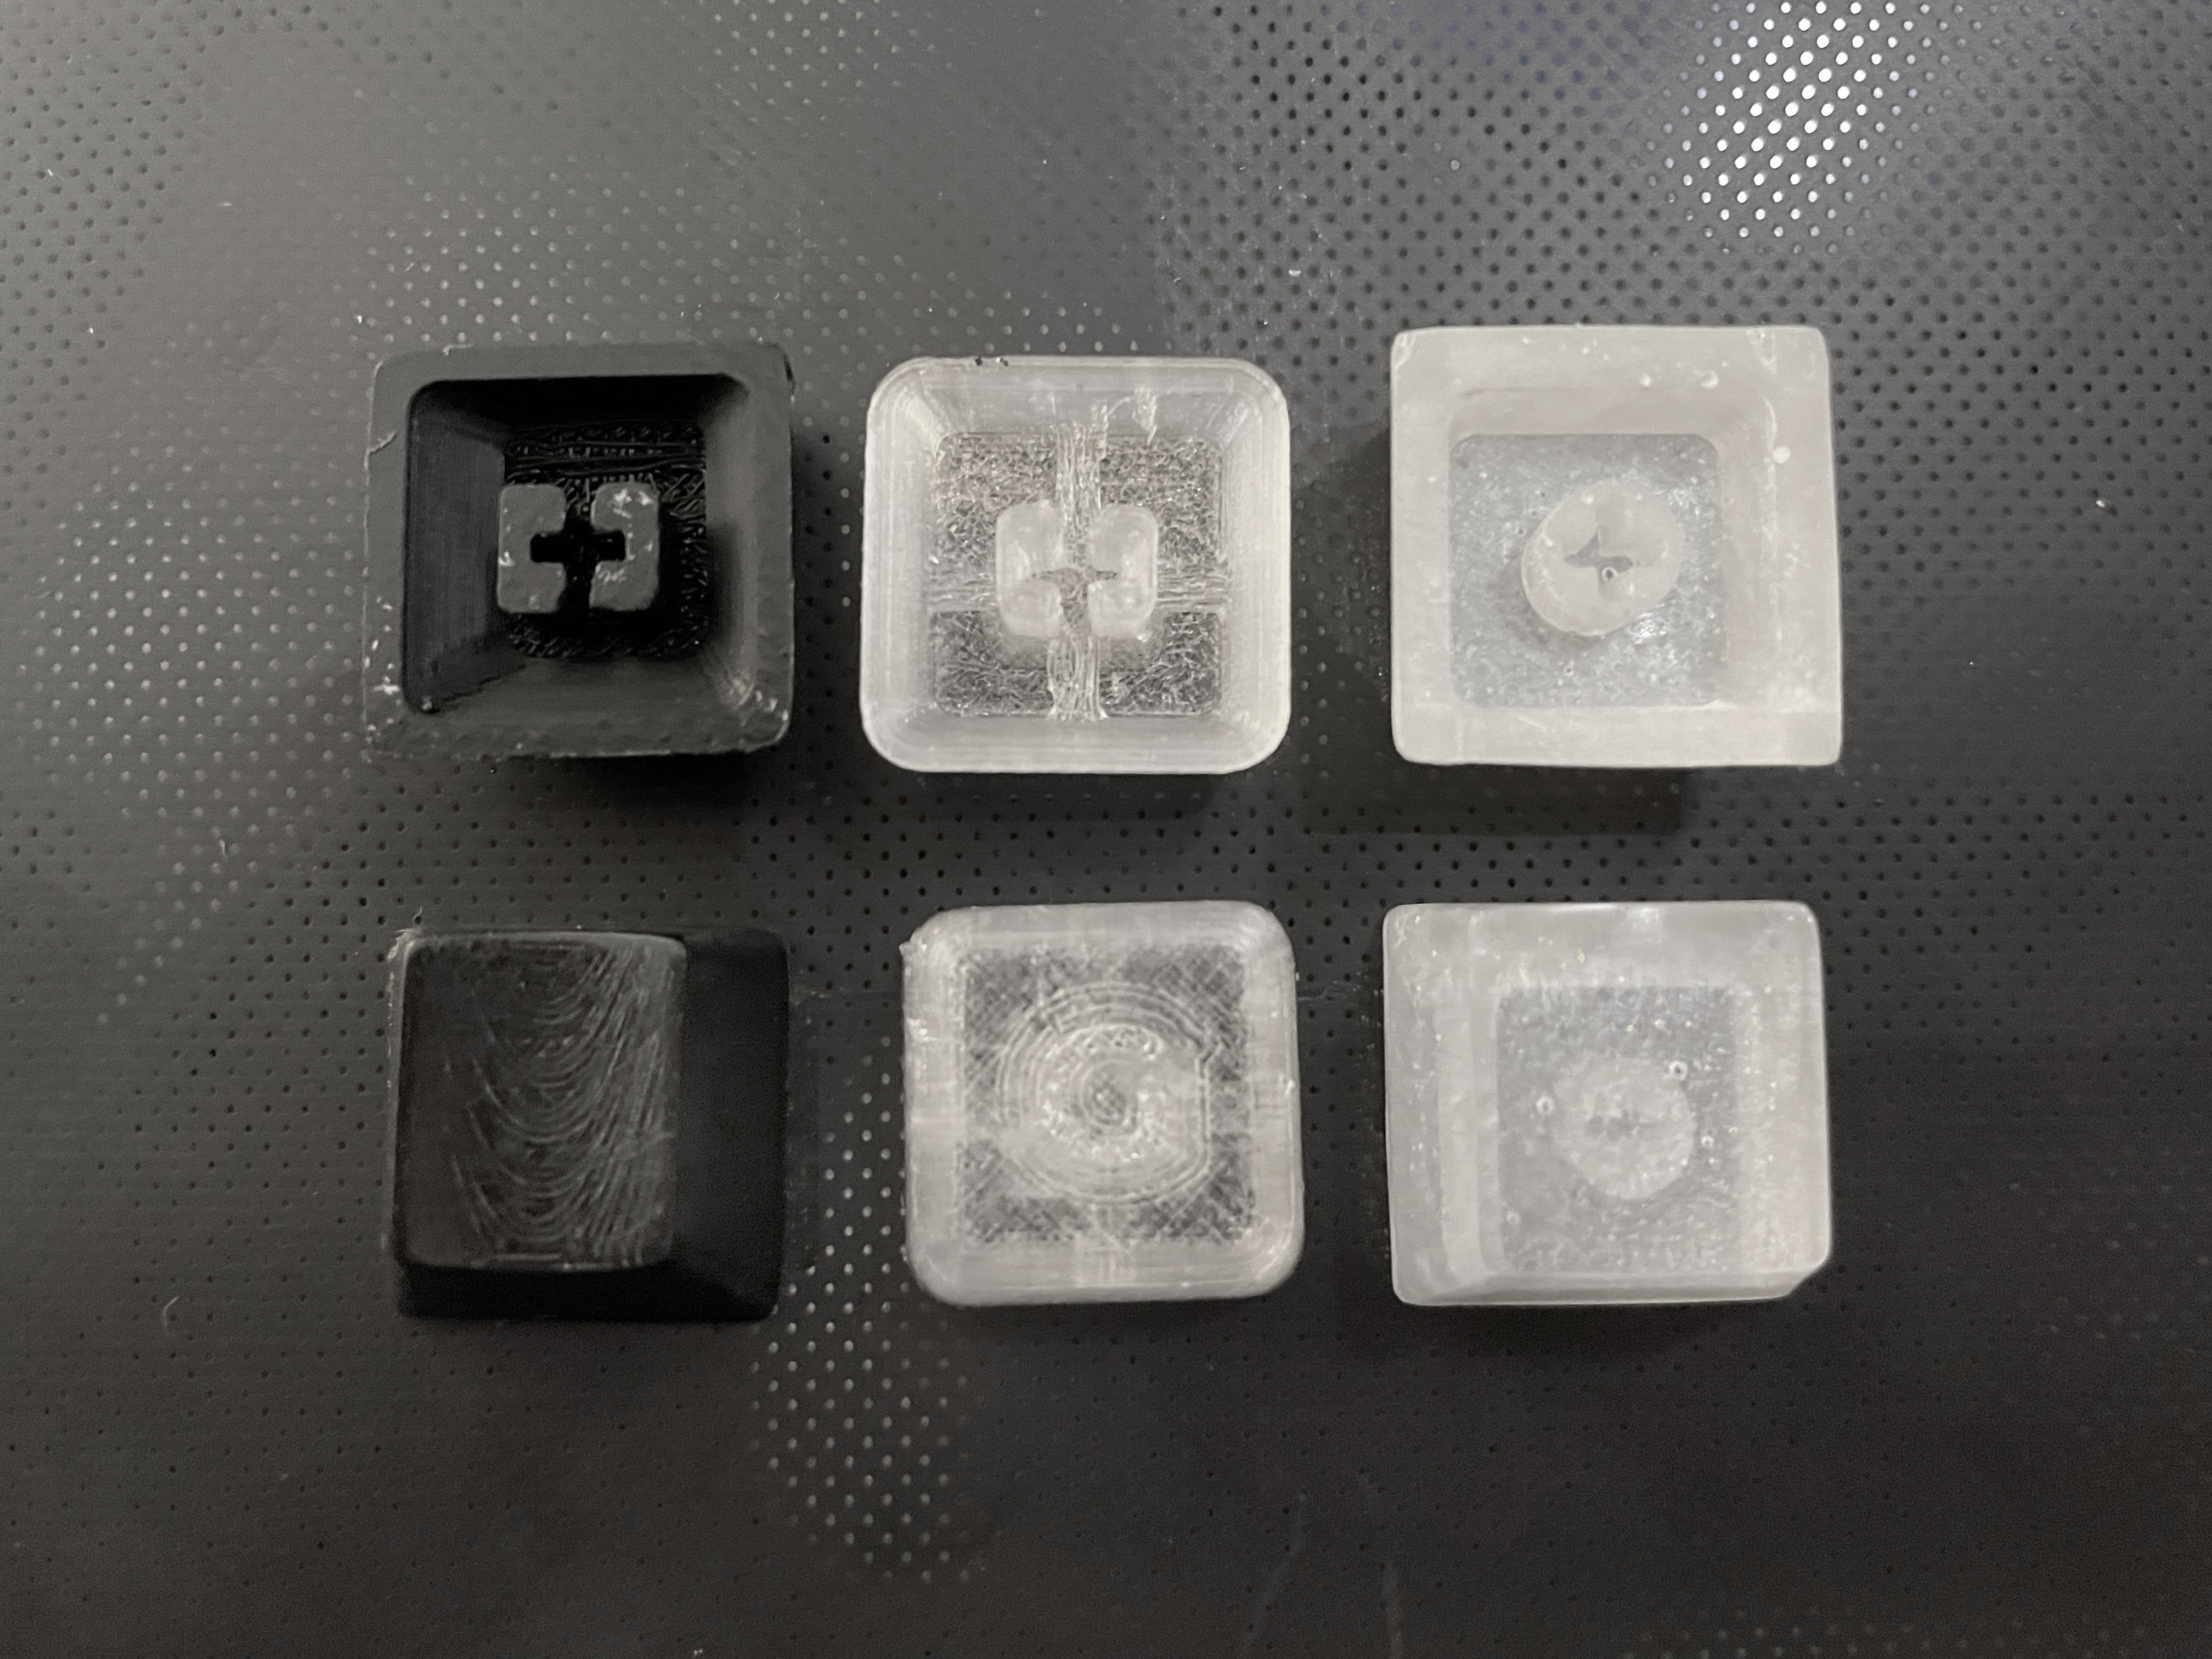
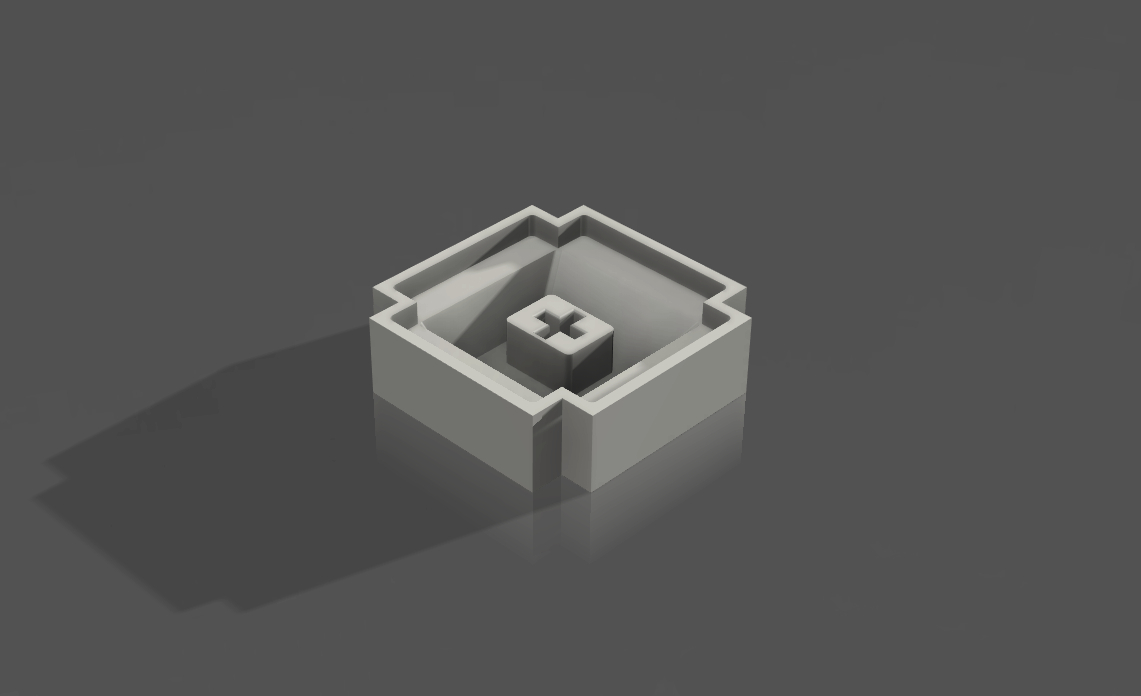
Specifically for the keycaps, a lot of effort has gone into rapidly prototyping keycap molds. The original 3D printed keycaps I had made where tedious to finish and aesthetic and tactile underwhelming. I then purchased silicone keycap molds but was not satisfied with the fit on the switch stem, as there was significant slop
Core materials acquired for the project were:
  • 1 roll of PLA filament ()
  • 100 Cherry MX Brown Keyswitches
  • 18 gauge solid core wire (already owned)
  • 250 1N4148 Diodes
  • 2 TRRS Jack
  • 1 TRS Cable
  • 1 USB Mini cable
  • 2 Teensy 2.0
Materials bought specifically for product finish and quality include:
  • Plastic bond epoxy
  • 2 Cans of Spray Paint
  • Plastidip
  • Sand paper (grits 150, 220, 320, 400, 800, 1000, 1500, 2000, 3000)
Tools and equipment that were not specific to this project but were useful and additions to my tool collection:
wooden stirring sticks
Artists’ work mat
General tools (already owned)
Materials for Keycaps
Dragon Skin 30 Silicone
Mr. Crafty Resin
Resin pigments
  • Soldering Iron
  • Voltmeter
  • Craft Blades
  • Precision Files
  • Dremel Stylo and additional bits
  • Artists' Work Mat
And finally, materials for the ongoing keycap fabrication process include:
  • Wooden stirring sticks
  • Dragon Skin 30 Silicone
  • Mr. Crafty Resin
  • Resin Pigments

Want to know more?

If you like what you see and want to learn more about making your own custom Quantum Mechanical Keyboard, get in touch!

Core materials acquired for the project were:
Finishing
Plastic bond epoxy
2 Cans of Spray Paint
Plastidip
Tools and Equipment
Soldering iron
Voltmeter
Sand paper (grits 150, 220, 320, 400, 800, 1000, 1500, 2000, 3000)
Craft blades
Precision files
Dremel Stylo plus additional bits
wooden stirring sticks
Artists’ work mat
General tools (already owned)
Materials for Keycaps
Dragon Skin 30 Silicone
Mr. Crafty Resin
Resin pigments